The Internet is full of photos and tutorials on how to install sonar on kayaks. Many are good, and in my opinion, others are just too snaggy and draggy - encumbering an otherwise sleek craft.
When we got our tandem Native Ultimate 14.5, I wanted to avoid as much of the transducer wires and mounting hardware, and to ensure a clean switch to a single configuration. Sometimes you just don't need sonar, so why have any remnants of its installation left behind?
Before I go any further, I do want to say that this unit has been tested for over two years now and it has been a great addition to our beloved hybrid. And although I have titled that it is for the Native Ultimate, I'm sure this would work in many canoes and other kayak hybrids.
The unit is completely self contained and only needs to have the bottom dipped in water, leashed, and then turned on. I'm sure there are ways to make the unit a little dock that it sits in, but I simply haven't made one. It shifts once in awhile, but it hasn't been much of a concern.
On to the tutorial :)
Tools & Supplies:
XNT 9 20 T Transducer
MS M Quick Disconnect Mount 740077-1
PC-10 Power Cable
Pelican 1050 Micro Hard Case
Marine Goop
File
2 Female spade connectors
Drill - small bit for pilot and larger 3/8" - 1/2" to make a hole big enough for the connectors that go up to the quick disconnect mount.
Utility knife
Wire stripper/crimping tool
Scissors
Zip ties
Perseverance
Pelican makes exceptional products, and the 1050 case looked to me like it had just enough room to squeeze some guts in to while holding the mount (humminbird in this case), to the top.
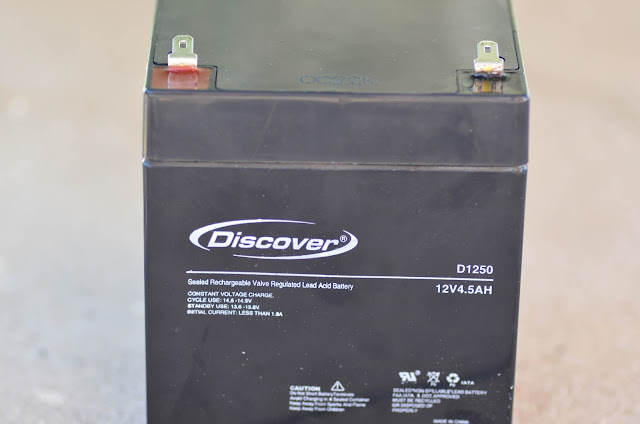
A trip to our local battery shop helped steer me in to a half-sized (4.5 amp hour) sealed lead acid battery.
The case will need to have a flat surface on the bottom, so carefully file down the two raised grooves.
The transducer that came with my 385ci, is the XNT 9 20 T. I have had great success with this transducer in the hull of two other kayaks, so I just cut the bottom from the rubber liner in the case and used marine goop to attach it to the bottom.
Position the transducer, battery, and liner together in the case, so you can tell exactly where the transducer needs to be glued down. There is absolutely no wiggle room as you can see.
Apply the sealant and transducer carefully to avoid getting any bubbles between the surfaces. Clamp it and tape the cable so that it doesn't move while the goop sets up. I would leave it overnight to make sure.
I tried to read up on shortening transducer cables, and from what I could gather and partially understand, the impedance of the cable could be adversely affected by cutting it. Since the unit is designed to work with the length of cable on the transducer, I chose to take on the task of carefully coiling the wire and binding it in place. You will need some patience for this, so be warned.
Make sure you have the battery in the case for reference to this point, or you won't know just how compact you have to make the cable for it to fit in there. You can see I used zip ties to compress them down and keep them in place. Position them underneath before you start coiling.
You need a more room than 3/8" for the plug on the power and transducer plug, so you will have to enlarge it a little with side pressure on the bit.
Since there isn't room to fit bolts through the case, I chose to use some marine goop to secure the mount.
You will have to shorten the power cable and add the female quick connectors.
Don't forget to fill the hole that the cables pass through with sealant as well.
I don't take the battery out to charge it. I just pull the leads back enough to get the alligator clips from the charger on them.
 |
| Unit with battery charger connected. |
I haven't tested how close the temperature is, but I don't think it's off very much once the boat is in the water. If I ever test this, I will update the info.
Now of course the battery doesn't last as long as the standard SLA, but I have found that it is a solid companion for a typical day of fishing. You can always turn it off when you don't need it.
The only thing you need to do before placing it in the kayak, is to get the bottom wet. Obviously it's best to do this close to shore in shallow water or with the unit tethered - it doesn't float.


